As the year progresses, maintaining a commitment to vegan eating can be challenging, but it remains a rewarding endeavor for those looking to benefit their health and the planet.
Interest in vegan dinners continues to grow, with many seeking innovative ways to keep their meals exciting and aligned with their dietary goals.
Whether they’re in it for health reasons of for the planet, Brits are still searching for vegan dinners by the fork-full to keep them on track for their end-of-month goal.
It follows a growing trend seen by recipe box provider Gousto, whose 2024 Food Trends Report found that one in four recipes chosen by its customers in 2023 were plant-based.
To support this journey, expert chef Sophie Nahmad from Gousto offers a variety of tips and recipes designed to enhance the vegan dining experience.
These culinary insights aim to help individuals stay committed to their vegan lifestyle throughout the year, ensuring that every meal is both nourishing and enjoyable.
1. How to season your jackfruit to perfection.
Sophie says: “Jackfruit is one of the foods that’s typically associated with a vegan diet, but so many people feel let down by the experience of eating it, simply because they don’t quite season it right!
You might think the fruit can be used as a direct replacement for meat, but unseasoned jackfruit has its own tangy flavour.
What you actually need to do is add savoury seasoning to the fruity flavour to achieve that famous pulled pork palate-pleaser.
“You can use your pulled-pork flavoured jackfruit to top a pizza, or in a bun, burger-style. I’d personally recommend giving pulled jackfruit enchiladas, tacos or burritos a go…”
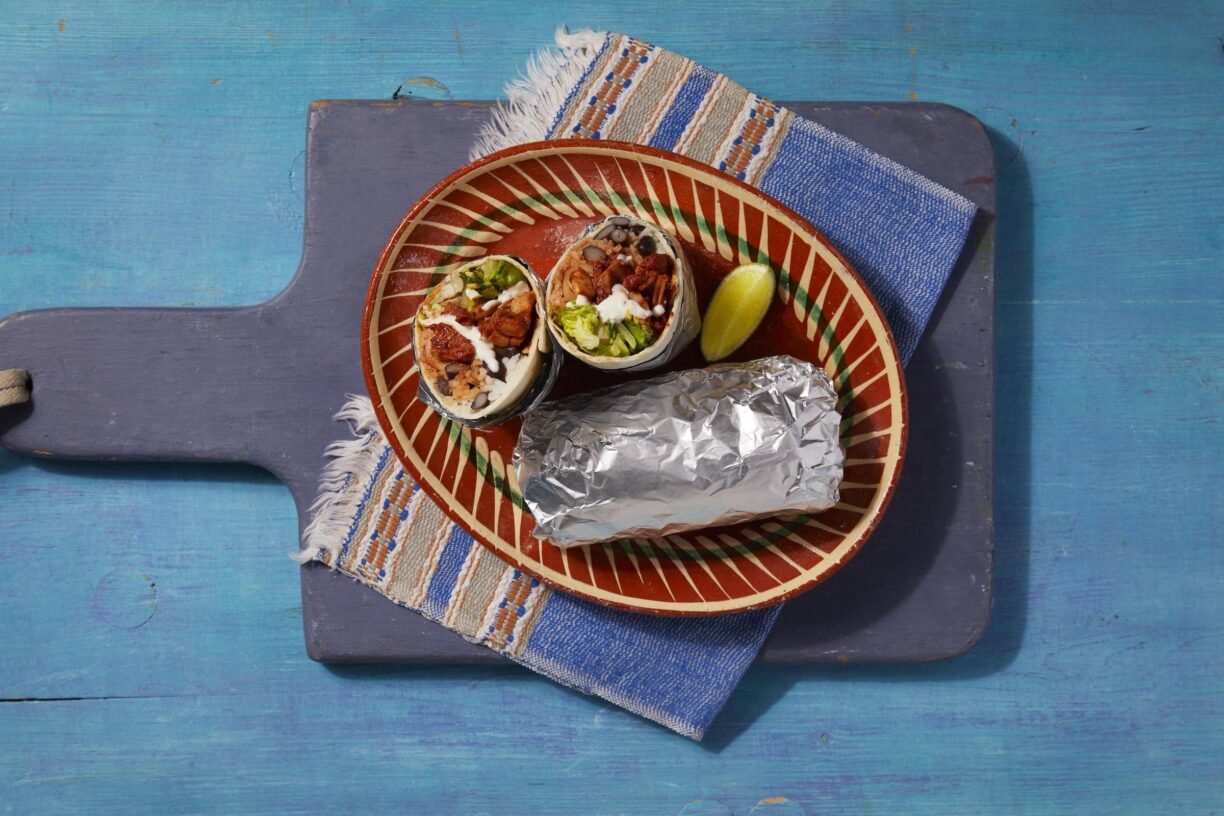
Pulled Jackfruit Burritos
Serves: 2
Time: 25 minutes
Ingredients
- A 185g can of black beans
- 1 little gem lettuce
- 1 can of jackfruit (565g)
- 4 large tortillas
- 2 tsp smoked paprika
- 32g tomato paste
- 1/2 tsp cayenne pepper
- 1 tsp ground cumin
- 45g free-from mayonnaise
- 100g basmati rice
- 8g soy sauce
- 1 lime
- 25g agave nectar
- Olive oil
- Salt & pepper
Method
- Preheat the oven to 200°C/ 180°C (fan)/ 395°F/ Gas 6.
- Add the basmati rice and 250ml cold water to a pot with a lid and bring to the boil over a high heat. Once boiling, reduce the heat to very low and cook, covered, for 10-12 min or until all the water has absorbed and the rice is cooked. Once cooked, remove from the heat and keep covered until serving.
- Meanwhile, boil half a kettle. Drain the jackfruit and tear into small, bite-sized pieces.
- Heat a large, wide-based pan (preferably non-stick) with a drizzle of olive oil over a medium-high heat.
- Once hot, add the torn jackfruit with the smoked paprika, ground cumin, cayenne pepper (can’t handle the heat? Go easy!), agave nectar, soy sauce and pinch of salt and pepper and cook for 2-3 min.
- Add the tomato paste with 100ml boiled water and cook for 3-4 min further or until thickened to a pulled pork consistency.
- Whilst the jackfruit is cooking, chop the little gem lettuce roughly. Combine the free-from mayo with the juice of 1/2 lime and season with a pinch of salt.
- Once the rice is cooked, stir the drained black beans through the rice and season with a pinch of salt – this is your beany rice. Once the jackfruit is almost done, add the large tortillas to a tray and put the tray in the oven for 1-2 min or until warmed through.
- Top each warmed tortilla with the beany rice, pulled jackfruit, shredded lettuce and lime mayo (the filling should be just off of the centre of the tortilla!). Tip: Go light on the filling on your first one so that you don’t overfill the burritos!
- To make the perfect burrito, fold the sides of each tortilla in and wrap the tortilla over the filling, tucking it in tightly.
- Roll the tortilla until you’re left with a burrito – these are your pulled jackfruit burritos. Use sheets of tin foil to hold everything together.
- Cut the remaining lime into wedges. Serve the pulled jackfruit burritos and garnish with a lime wedge.
2. How to stop your tofu from going soggy.
Sophie says: “Tofu is another vegan-friendly food that is extremely hit or miss, and what’s key is getting the preparation right before you cook it.
Tofu is porous, like a sponge. If it’s already full of water, there’s no room to absorb any flavour or marinade. Plus, that water will release during cooking, meaning you won’t get the perfect crispy texture.
“After removing tofu from its packaging, rinse it and blot it dry. For soft tofu, rinsing and blotting is all you need to do, but if it’s medium, firm or extra-firm, you’ll need to press the water out.
To press out the water, sandwich the tofu between multiple layers of paper towels, then between two plates.
Weigh the top plate down with something heavy, like a bag of flour, a cookbook or a cast-iron skillet. Drain the liquid about every 30 minutes until there’s no more coming out.”
“Crispy tofu pairs perfectly with rice – it’s a great vegan satay alternative…”
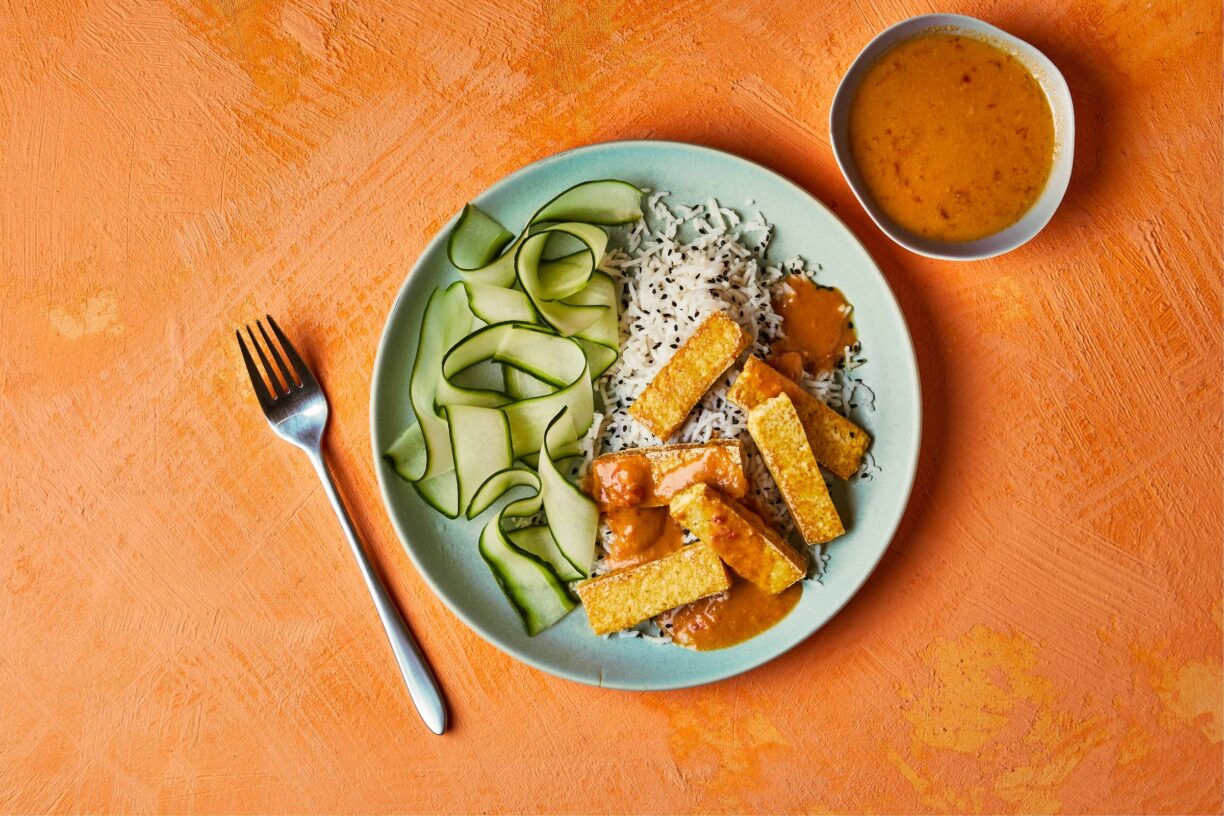
Crispy Tofu with Sesame Rice And Satay Sauce
Serves: 2
Time: 25 minutes
Ingredients
- 50g solid creamed coconut
- 26g smooth peanut butter (just make sure it’s vegan)
- 40g red chilli relish
- 130g white long grain rice
- 280g plain tofu
- 1/2 cucumber
- 15ml rice vinegar
- 5g black sesame seeds
- 30ml soy sauce
- Salt
- Vegetable oil
Method
1. Rinse the white long-grain rice until the water runs clear, then add it to a pot with a lid with 225ml cold water and bring to the boil over a high heat.
2. Once boiling, reduce the heat to very low and cook, covered, for 12-15 min or until all the water has absorbed and the rice is cooked. Once done, remove from the heat and set aside (lid on) to steam until serving.
3. Meanwhile, boil half a kettle. Drain the tofu, then pat it dry with kitchen paper. Cut the tofu into 12 strips.
4. Heat a large, wide-based pan (preferably non-stick) with a generous drizzle of vegetable oil over a high heat. Once very hot, add the tofu strips and cook for 5-6 min, turning occasionally until golden and crisp. Once the tofu is crisp, transfer it to kitchen paper and set aside (reserve the pan for later!) – this is your crispy tofu.
5. While the tofu is cooking, chop the creamed coconut roughly (if required!). Dissolve the chopped creamed coconut, peanut butter, chilli relish and soy sauce in 200ml boiled water in a jug. Stir it all together – this is your peanut stock.
6. Peel lengths off the cucumber until you end up with a pile of cucumber ribbons, discard the watery seeds. Add the cucumber ribbons to a large bowl and set aside. Add the rice vinegar to the cucumber ribbons and season with a generous pinch of salt – this is your cucumber salad.
7. Carefully wipe the reserved pan clean and return it to a medium-low heat. Add the peanut stock to the pan and cook for 2-4 min or until thickened slightly – this is your satay sauce.
8. Fluff the cooked rice with a fork, add the black sesame seeds and give everything a good mix up – this is your sesame rice.
9. Serve the crispy tofu over the sesame rice with the cucumber salad to the side. Pour the satay sauce all over the crispy tofu.
3. How to make sure you’re still getting enough protein
Sophie says: “A quick protein win for vegans is lentils and pulses, and they’re also a great source of fibre. Pulses and lentils need minimal water to grow, improve soil fertility and reduce dependence on energy-intensive fertilisers, so they’re actually also one of the most sustainable foods you can include in your diet.
If you’re taking part in Veganuary for sustainability reasons, they’re a must-have in your ingredients list.
“Pulses and lentils can often be seen as a ‘boring’ food or a filler, but they can actually be a really delicious staple. As well as salads and stews, you can add this pantry staple to a spicy curry, a moreish moussaka, or a rich Bolognese…”
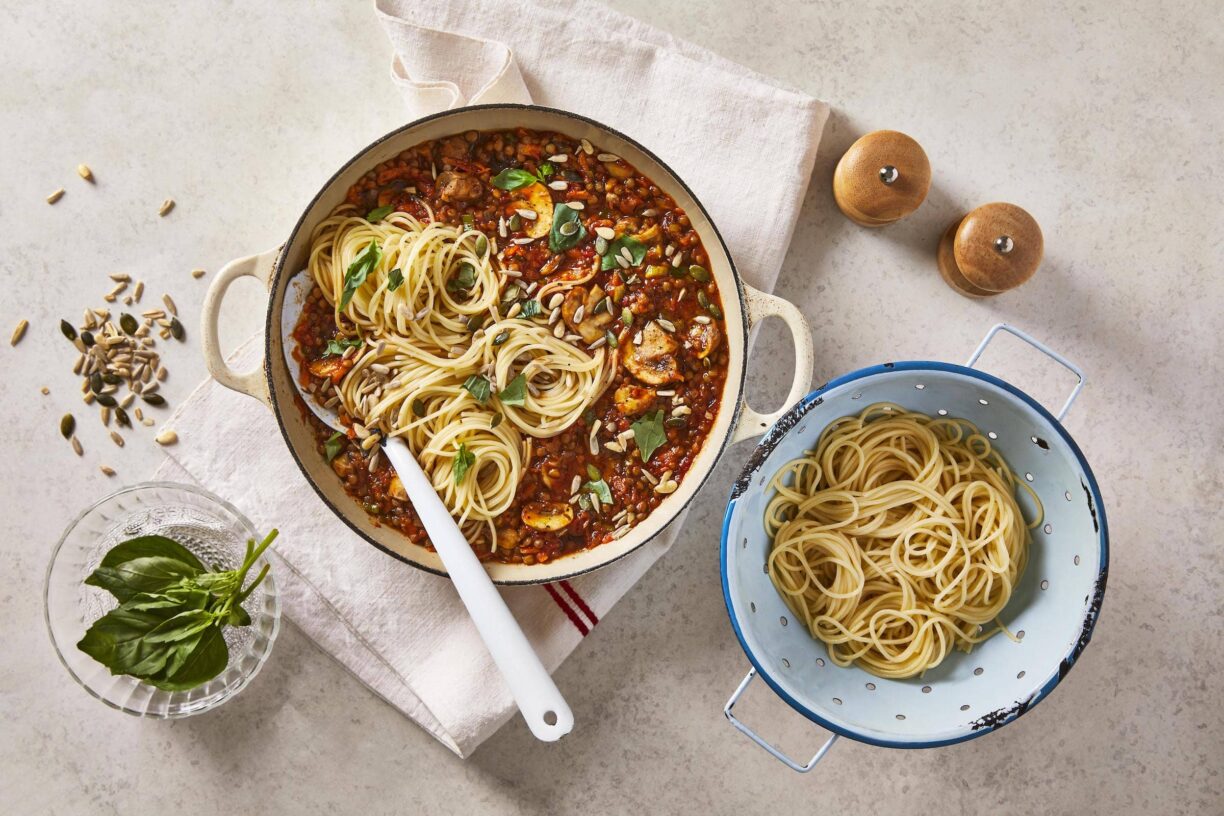
10-Min Lentil Ragù with Spaghetti
Serves: 2
Time: 10 minutes
Ingredients
- 8g Marmite
- 1 can of tomato frito (200g)
- 15g roasted garlic paste
- 1 can of green lentils (400g)
- 160g quick-cook spaghetti
- 10g basil
- 2 spring onions
- 16g tomato paste
- 1 tsp dried oregano
- 160g chestnut mushrooms
- 1 carrot
- 30g pine nut & seed mix
- 1/2 Knorr vegetable stock cube
- Salt & pepper
- Olive oil
Method
1. Boil a kettle. Heat a large, wide-based pan (preferably non-stick) with a drizzle of olive oil over the highest heat.
2. Top, tail, peel and grate the carrot. Trim, then chop the spring onions roughly (chop them in one bunch for speed!).
3. Once hot, add the chopped spring onions and grated carrot to the pan. Tear the chestnut mushrooms into the pan and cook for 3-4 min or until starting to brown
4. Meanwhile, add the quick cook spaghetti to a pot of boiled water with a large pinch of salt and bring to the boil over a high heat. Cook the quick cook spaghetti for 3-4 min or until cooked with a slight bite. Once done, drain the quick cook spaghetti and return it to the pot with a drizzle of olive oil.
5. While the spaghetti is cooking, drain and rinse the lentils.
6. Add the roasted garlic paste and dried oregano to the pan and cook for 30 secs. Crumble in ½ Knorr vegetable stock cube. Add the tomato frito, tomato paste and drained lentils with 100ml water and the Marmite and bring to the boil over a high heat. Once boiling, cook for 2-3 min or until the sauce has thickened.
7. Season with a pinch of salt and a grind of black pepper – this is your lentil ragù. Set the lentil ragù and cooked spaghetti in the centre of the table, ready to share. Tear the basil leaves over, sprinkle with the pine nut & seed mix and let everyone dig in
4. Don’t just rely on meat substitutes
Sophie says: “You don’t just need to fill your fridge with meat substitutes if you’re committing to a vegan diet. In fact, it can be quite expensive to rely on these alternatives! Instead I’d always recommend making the most of the huge variety of vegetables available to you – don’t just stick to carrots, broccoli and peas as your nutritious staples.
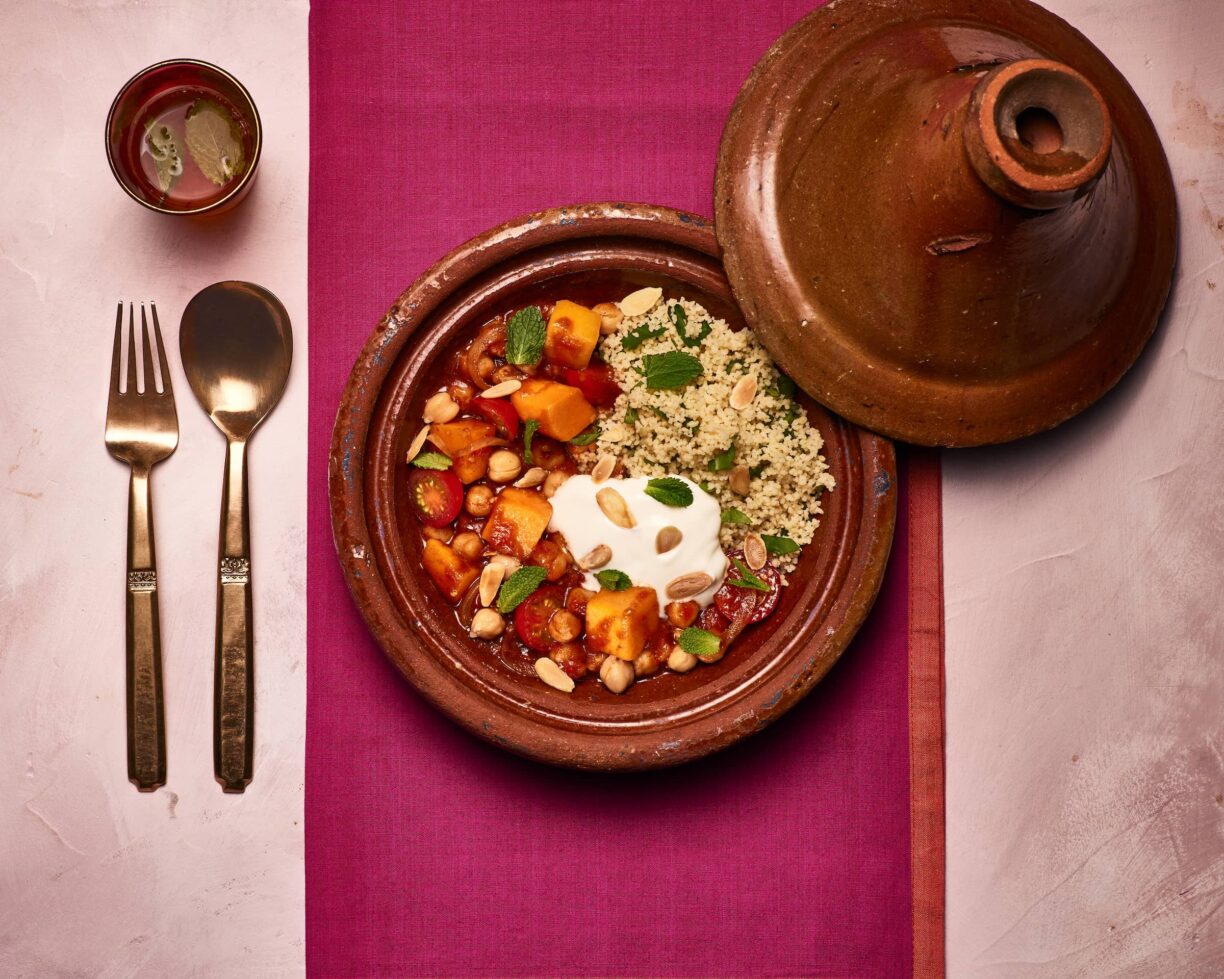
“Mushrooms, aubergine and butternut squash are great vegetables to use as the foundation of a variety of dishes. Think curries, stews, and even tagines…”
Chickpea, Butternut Squash & Apricot Tagine
Serves: 2
Time: 30 minutes
Ingredients
- 400g canned chickpeas
- 160g butternut squash cubes
- 120g couscous
- 20g harissa paste
- 11g vegetable stock mix
- 16g tomato paste
- 1 tsp ground turmeric
- 1 garlic clove
- 1 tbsp baharat
- 30g diced apricots
- 1 brown onion
- 10g coriander & mint
- 15g flaked almonds
- Olive oil
- Salt
- Vegetable oil
Method
- Boil half a kettle. Peel and finely slice the brown onion. Peel and finely chop (or grate) the garlic.
- Heat a large, wide-based pan (preferably non-stick with a matching lid) with a drizzle of vegetable oil over a medium heat. Once hot, add the sliced onion with a pinch of salt and cook for 6-8 min or until caramelised.
- Dissolve the tomato paste, harissa paste (can’t handle the heat? Go easy!) and half the vegetable stock mix (you’ll use the rest later!) in 350ml boiled water – this is your harissa stock.
- Drain and rinse the chickpeas. Once the onion has caramelised, add the chopped garlic, baharat and butternut squash cubes and cook for 2-3 min or until fragrant.
- Reboil a kettle. Once fragrant, add the harissa stock, drained chickpeas and diced apricots and cook, covered, for 10-15 min or until the sauce has thickened and the squash is tender – this is your chickpea, butternut squash & apricot tagine. Season with a pinch of salt.
- Dissolve the remaining vegetable stock mix in 200ml boiled water. Add the couscous to a heatproof bowl with the ground turmeric and vegetable stock, cover and set aside.
- Meanwhile, heat a separate large, wide-based pan (preferably non-stick) over a medium heat. Once hot, add the flaked almonds and cook for 1-2 min or until browned all over. Tip: Watch them like a hawk to make sure they don’t burn!
- Strip the mint leaves from their stems and chop most of them finely, discarding the stems (save some whole leaves for garnish!). Chop the coriander finely, including the stalks.
- Once the couscous is done, add the chopped coriander and mint with a drizzle of olive oil, then fluff with a fork – this is your minty couscous.
- Serve the chickpea, butternut squash & apricot tagine over the minty couscous. Garnish with the toasted flaked almonds and reserved mint leaves.
5. Keep your chickpea water (aquafaba) handy
Sophie says: “One of my favourite vegan dessert and baking hacks is to make the most of aquafaba, which is the water that comes in your chickpea can.
If you’re having chickpeas for lunch or dinner, drain the aquafaba into a bowl rather than down the sink. It’s perfect for whipping up like cream, which causes it to foam and expand into a pillowy mass that looks and tastes just like meringue.
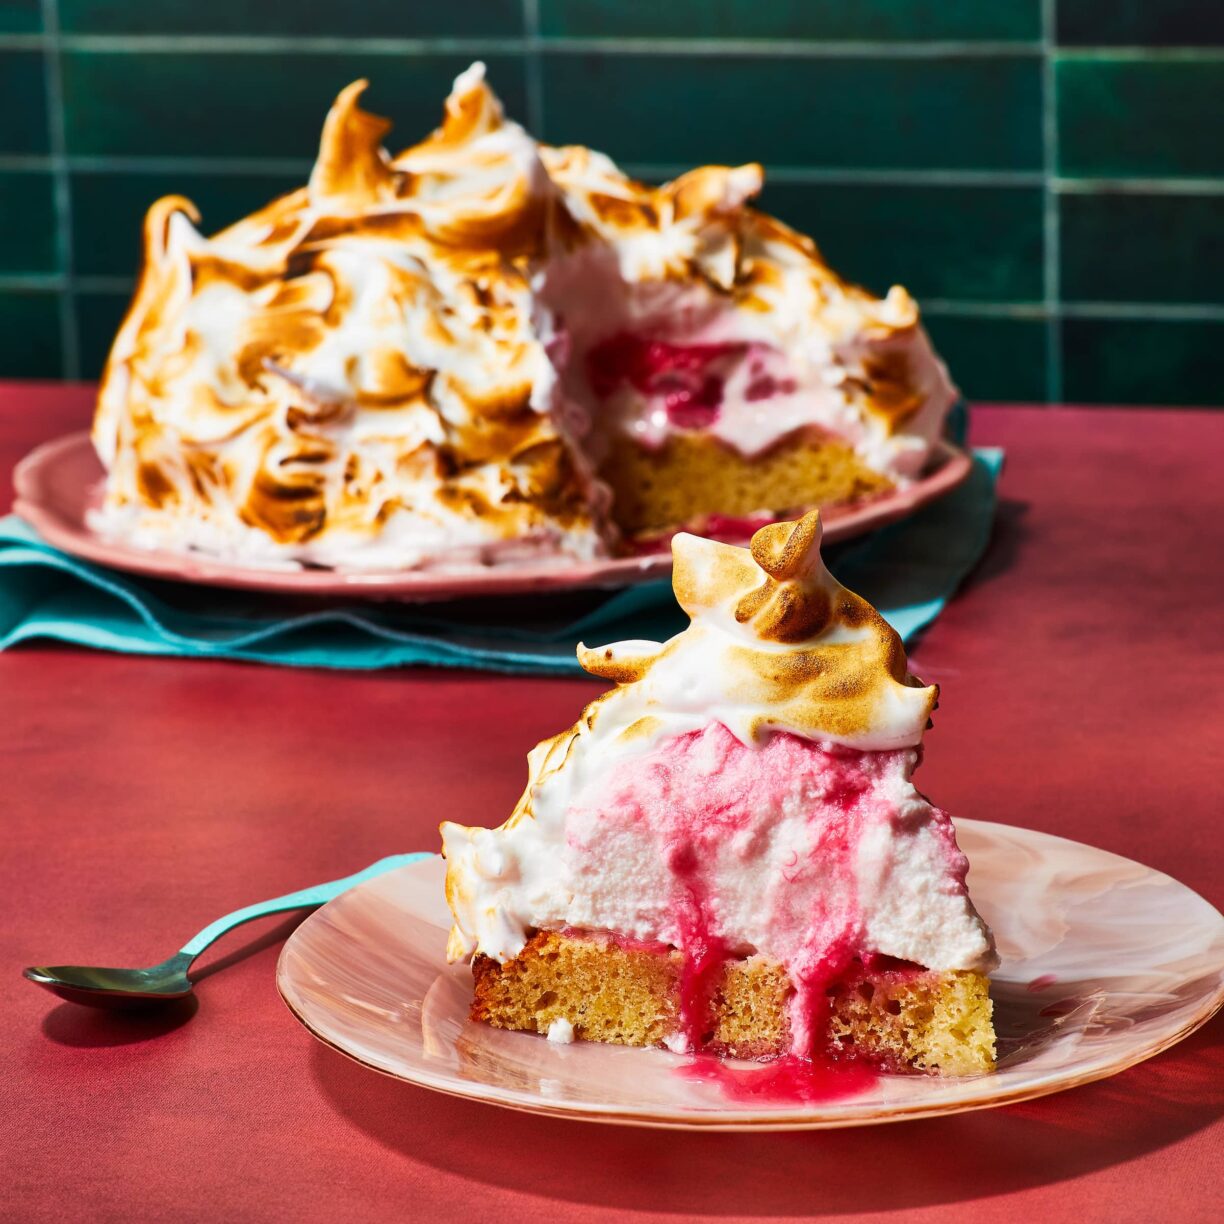
Not only does this help you to cut down on food waste, but it means that your vegan diet doesn’t need to be missing your favourite desserts, like baked Alaska…”
Vegan Gluten-Free Rhubarb Baked Alaska
Serves 8-10
Prep time: 35 – 40 minutes
Total time: 4.5 hours + overnight
Ingredients
For the frozen yoghurt
· 350g natural coconut yoghurt
· 3 sticks rhubarb
· 1 orange
· 2 tbsp maple syrup
For the sponge
· 230ml plant-based milk (we used oat)
· 2 tsp cider vinegar
· 120g almond flour
· 120g gluten free self-raising flour
· 2 tsp baking powder
· 175g caster sugar or 175 ml maple syrup (if you’re using maple syrup, use 70ml less plant milk)
· 1 tbsp vegetable oil
For the meringue
· Aquafaba (1 tin of chickpeas worth)
· ½ tsp Cream of tartar
· 250g Caster sugar
· 2 tsp Agar agar
You’ll also need…
· 20cm cake tin
· Candy thermometer
Method
1. Start by making your frozen yoghurt in a domed bowl that’s 1-2cm smaller in diameter than the cake tin. Pour in your yogurt, add 1 tbsp of maple syrup and stir until well combined. Put the bowl in the freezer while you make the rhubarb ripple.
2. Chop your rhubarb into small pieces. Add them to a saucepan with the remaining maple syrup, orange juice and zest. Cook on a medium heat until vibrant pink and the rhubarb has cooked down to a thick syrup, about 10 minutes.
3. After the yoghurt has had 30 minutes in the freezer, take it out and stir in the frozen edges using a fork. Repeat this process three more times. Once done, swirl in your rhubarb to make the ripple then return the frozen yoghurt to the freezer until you are ready to assemble your dessert.
4. Preheat the oven to 180ºC / 160ºC Fan / Gas mark 4. Then, in a large bowl, mix your dry ingredients together so everything is well distributed. Then add your wet ingredients and whisk together until a smooth batter forms.
5. Grease your cake tin with the vegetable oil and line the base with a circular piece of baking paper. Bake in the oven for 20 – 25 minutes or until a skewer comes out clean and the cake is golden. Leave it to cool completely.
6. Leave your aquafaba in the fridge for at least 1 hour till cold.
7. Once cold, add the aquafaba to a bowl with the cream of tartar. Then, using an electric whisk, whisk on high for 5 – 10 minutes until peaks start to form. If you have a stand mixer, leave to whisk while you get on with step 2.
8. While that’s whisking, add your caster sugar, agar agar and 80 ml of water to a small saucepan and, using a candy thermometer, bring it to 120ºC.
9. Once it’s reached 120ºC, slowly pour your sugar syrup into your meringue whilst still whisking. Whisk for another 7- 10 minutes until the meringue is glossy and firm.
10. Place your sponge on a plate or cake stand. Take the frozen yogurt out of the freezer and place on your sponge domed side up.
11. Working quickly, use a spatula to cover your frozen yoghurt with meringue. The colder the frozen yoghurt is, the more the meringue will stick. Tip: If it has warmed up slightly, place the frozen yoghurt back in the freezer to harden again.
12. Once fully coated in meringue, use a blowtorch to toast the meringue and get a nice even colour all over.
For more vegan recipe inspiration, visit the Gousto website.

